
Follow the steps below to learn how to make 7(a) or PPP loan payments in the NEWITY portal.
Step 1: Log in to the Portal
To begin, log in to the NEWITY Portal.
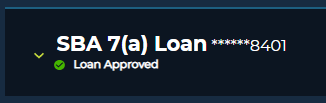
On the dashboard, click the loan to expand the loan detail display.
Click the Make Payment button.
image 1
Step 2: Enter Payment Information
After clicking Make Payment, enter the information requested on the Make a Payment screen. This includes:
- Payment Date
- Payment Frequency
- Payment Amount
- Payment Method
- Bank Account Numbers
- Routing Number
- Account Type (Checking or Savings)
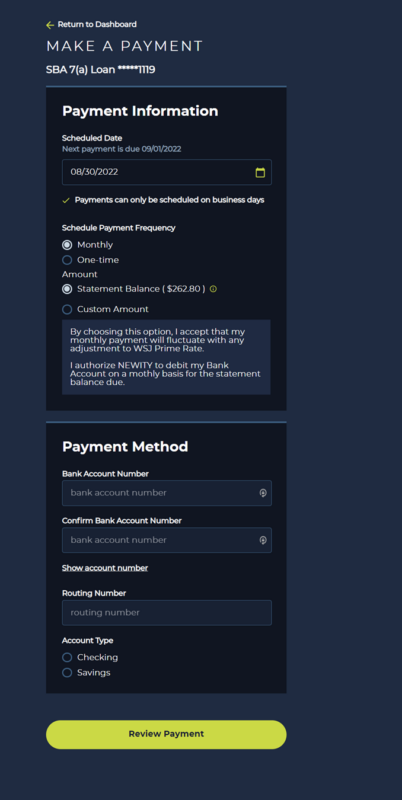
Please confirm: all information is entered before proceeding to Review Payment, and that your account numbers/routing number are nine digits.
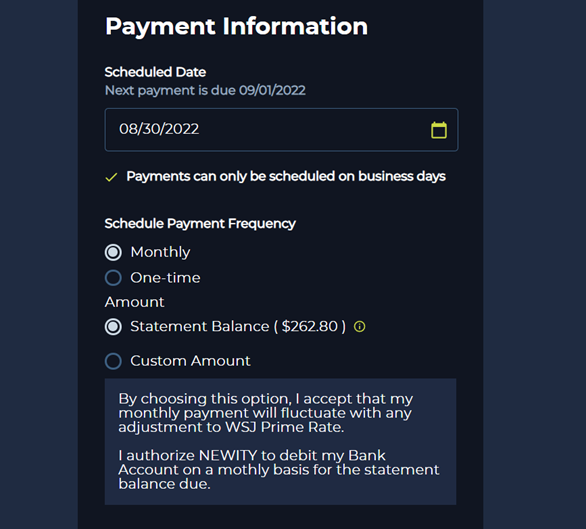
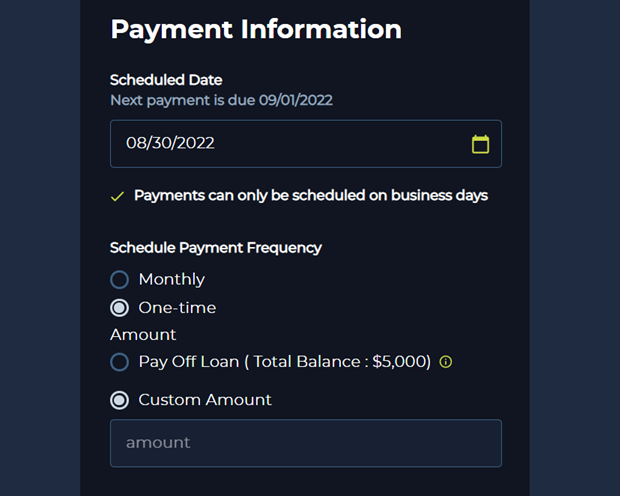
Step 3: Select Payment Frequency
To set up recurring payments, select Monthly under Schedule Payment Frequency. Selecting Monthly will schedule a payment of the selected amount (either Statement Balance or Custom Amount) from the designated account on the same day of each month.
- Statement Balance refers to the total amount due including any fees or interest
- Custom Amount allows you to select any number above your statement balance if you would like to choose to pay more per month.
To establish one-time payments, select One-time under Schedule Payment Frequency. Selecting One-time will schedule a one-time payment of the selected amount (either Pay Off Loan or Custom Amount) from the designated account.
- Pay Off allows you to pay the full amount of your loan in that one-time payment
- Custom Amount allows you to choose any amount to pay one-time
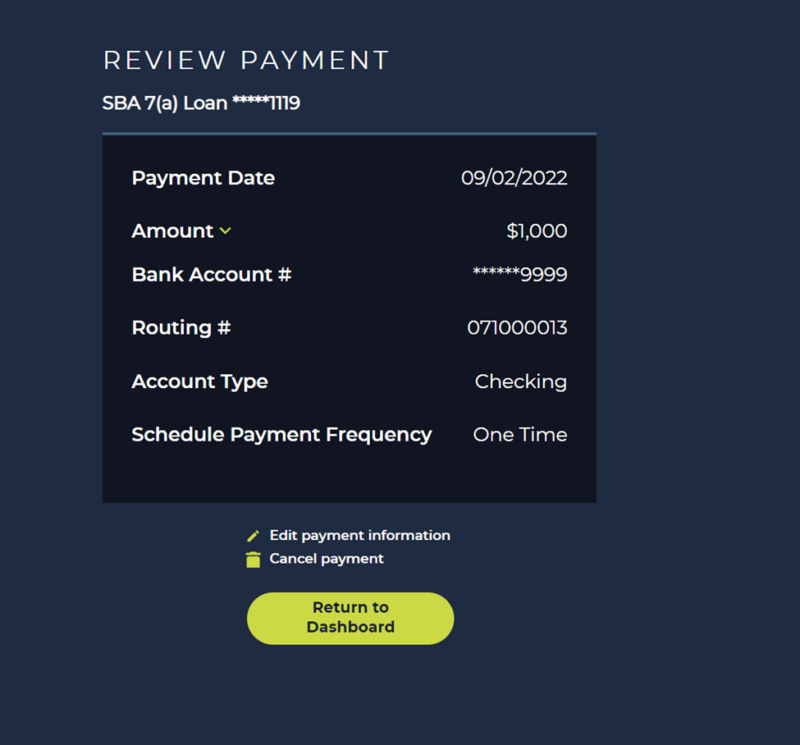
Step 4: Review Payment
Once you have confirmed your information and billing frequency is entered correctly, select Review Payment.
A review payment screen will be presented to perform a final review of the payment information.
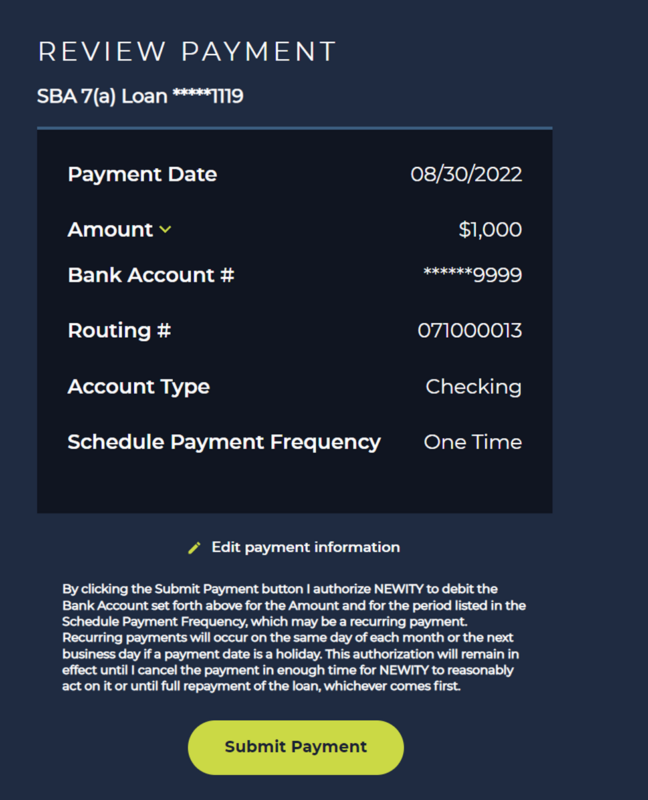
If you need to make any changes, select Edit payment information to return to the previous screen.
Please note: Make sure to double-check the payment amount and frequency on this page – refer to Step 3 for information on one-time and monthly payments.
Step 5: Submit Payment
Once you have confirmed your details are accurate, select Submit Payment.
After you have selected Submit Payment, you will see a green confirmation notification that the payment was successfully posted the Portal.
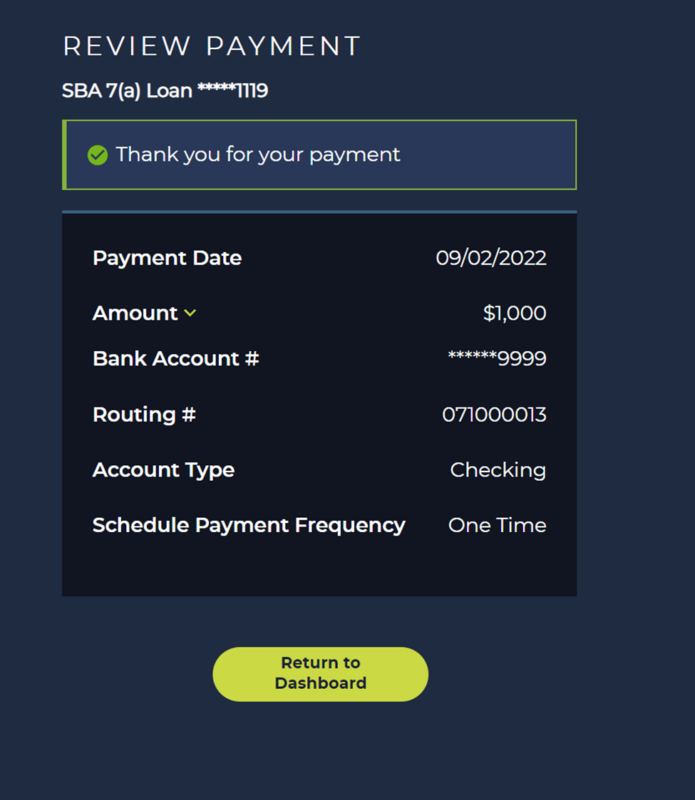
By selecting Return to Dashboard you will be brought back to the NEWITY Portal dashboard. If you set up recurring payments, you will see a note beneath your loan indicating monthly billing has been established.

Step 6: Edit or Cancel Payments
Editing or cancelling payments, whether recurring or one-time, is very similar:
- To edit or cancel recurring payments, log into the NEWITY Portal, click the loan to display more details, and select View recurring payments.
- To edit or cancel one-time payments, log into the NEWITY Portal, click the loan to display more details, and select View Payment.
In the Review Payment screen, you can select Edit payment information to update the designated account or Cancel payment to terminate the payment.
Please note: Payments scheduled for the current day can be cancelled until 2:00pm CT of that day.
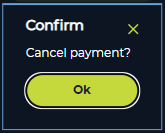
If you select Cancel payment, you will be asked for confirmation. To finalize payment cancellation, select Ok.
After finalizing payment cancellation, you will see a green notification confirming that the payment has been cancelled.
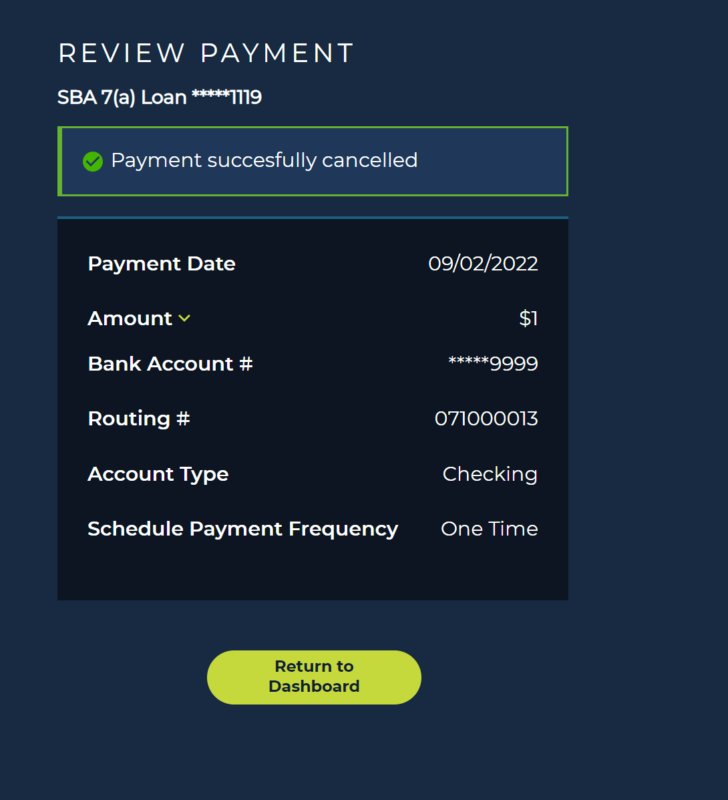
After cancelling payment, you will also see any scheduled payment will no longer appear on your dashboard.
For more information on editing payment amount, frequency, or type, refer back to Step 2: Enter Payment Information and Step 3: Select Payment Frequency